Building a Miniature Pinball Machine with ROKR
Key Takeaways
- Learn how to build a functional miniature pinball machine using ROKR sets.
- Step-by-step instructions guide you through the construction process.
- Discover tips on enhancing your pinball machine for a more enjoyable experience.
- Understand the different features and components involved in your build.
Introduction
Creating a miniature pinball machine is a fantastic project for both novice and expert builders alike. With the right tools and a ROKR set, you can bring your gaming dreams to life. This guide will walk you through everything you need to know to construct your very own machine, combining both fun and learning along the way.
Why Choose ROKR Sets?
ROKR sets are perfect for DIY projects, particularly for constructing intricate models like a pinball machine. They provide:
- Clear, precise instructions.
- High-quality materials that ensure durability and functionality.
- A rewarding experience that combines education with entertainment.
Essential Tools and Materials
Before diving into the construction, gather the following tools and materials:
- ROKR 3D Wooden Puzzle DIY Building Toy
- Craft knife or scissors
- Glue (non-toxic and safe for children)
- Sandpaper for smoothing edges
- Flat working surface
 Awesome DIY Kit
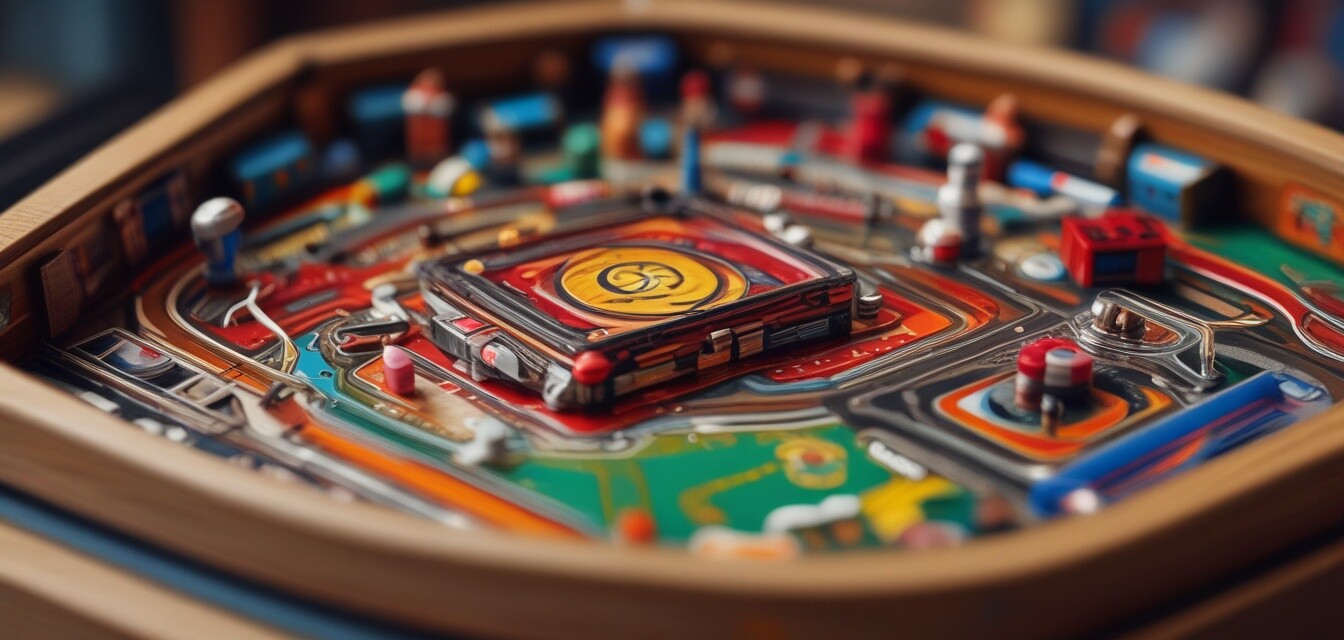
ROKR 3D Wooden Puzzle DIY Building Toys Mechanical Model
Construct your very own miniature pinball machine with this detailed DIY building toy that features wood targets and rubber bands for ultimate fun!
Learn MoreSteps to Build Your Miniature Pinball Machine
- Read the Instructions: Always begin by thoroughly reading the instructions provided with your ROKR set. This will give you an overview of the components and the construction process.
- Prepare the Workspace: Ensure your work surface is clean and you have ample space to work.
- Assemble the Base: Start with the base of the pinball machine. Follow the diagram closely and use glue as needed to secure the pieces together.
- Build the Playfield: Once the base is complete, construct the playfield area. This is where the action takes place.
- Add the Targets: Install the wooden targets provided with the kit. Be sure they are securely in place for maximum durability during gameplay.
- Finish the Details: Paint or decorate your pinball machine to give it a unique flair. Creativity is encouraged with this step!
- Test the Mechanism: After the assembly is complete, test the mechanism with the rubber bands to ensure it functions correctly.
Enhancing Your Pinball Machine
Once you’ve built your machine, you may want to enhance its functionality and aesthetics:
- Add lights for a more arcade-like experience.
- Use decals or stickers to personalize the playfield.
- Experiment with different types of rubber bands for varied gameplay.
Troubleshooting Common Issues
If you encounter any problems during your build or whilst playing, here are some common troubleshooting tips:
- Jam Issues: Ensure all parts are well fitted and nothing is obstructing the mechanics.
- Poor Aim: Adjust the angle of the targets if they're too difficult to hit.
- Durability Concerns: Use additional glue on joints that may appear unstable after testing.
Conclusion
Building your own miniature pinball machine with ROKR sets can be a fulfilling and entertaining project. Not only do you create a fun game to share with friends and family, but you also dive into the world of DIY mechanics. With a little patience and creativity, your pinball machine can become a centerpiece of excitement in your home.
Tips for Beginners
- Start with smaller kits first if you’re new to DIY projects.
- Don’t rush the assembly—take your time for the best results.
- Join communities or forums online to share your experience and get tips from other builders.
Pros
- Enhances creativity and problem-solving skills.
- Provides hours of interactive entertainment.
- Can be fully personalized to suit your style.
Cons
- Can be challenging for absolute beginners.
- Requires time commitment to successfully complete.
- Potential for small parts to be lost during assembly.